Sprite Comic Guide
Alright, so you want to make sprite comics. Well first you've got to have an image program. The program I use is MS Paint, which I believe comes free with every edition of Windows. (for those of you who use a Mac or a Linux, you're out of luck) First of all, you want to have the canvas be the right size. To do this, click "Image" on the top bar, then click "Attributes". Set the width to 800 and the height to 200. Next you need to make a framework. Do this by drawing a vertical line straight down the middle of the canvas. This will split the picture into two rectangles. Now draw a vertical line straight through the middle of each rectangle, dividing the picture into four perfect squares. It should look like this:

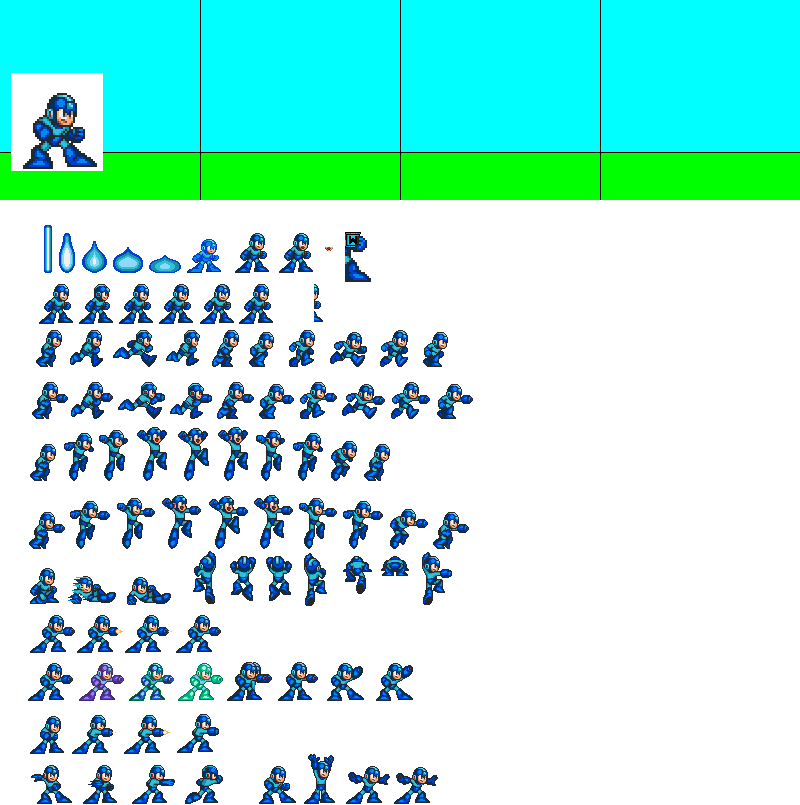
If your comic is in 3-d (like the Popemon comics) use the framework you just made. If your comic is 2-d (like the Megaman and Zelda comics) add a horizontal line near the bottom for the horizon. It should look like this:

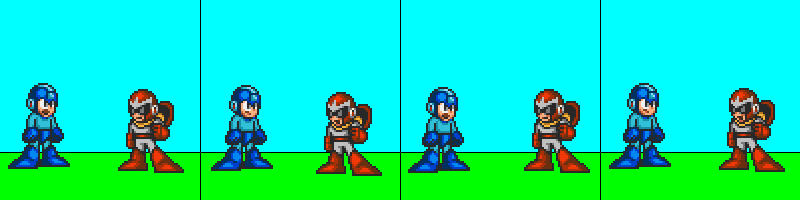
Now it's time to add a background. Let's just say your comic is 2-d. Get the paint bucket tool and pick an appropriate color for the ground. Dump the color into the spaces underneath the horizon. Now pick a color for the sky. Dump this color into the spaces above the horizon. Your comic should look something like this:

Now it's time to pick out some sprites. First, enlarge the canvas to a big size, then click "Edit" then "Paste from". Find the sprite sheet you want to use, and select it. Put it into the space under the canvas.
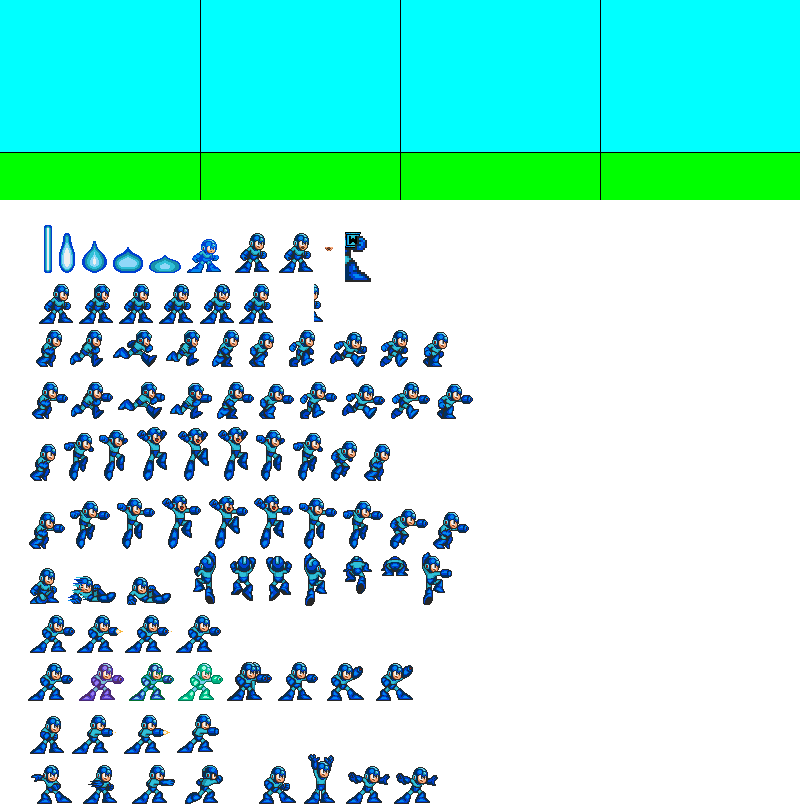
Now, I think these sprites are too small, so use the selector tool to select a sprite, then back click and press copy. Now back click anywhere on the picture and hit paste. The sprite you selected will pop up in the top of the picture. Now, to fix the size problem, click "Image" then "Stretch/skew". Make sure the sprite is still selected. Now, on stretch, set "horizontal" and "vertical" to 200 and press "okay". The sprite will enlarge itself to twice it's original size. Now, you might notice that when you drag the sprite, a white box surrounds it.
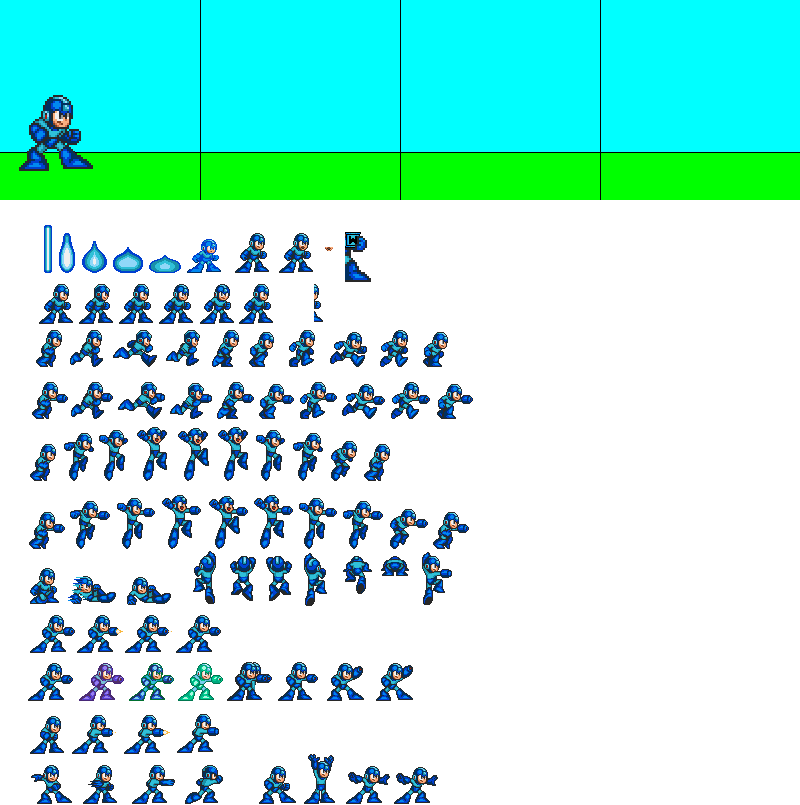
Now you could just fill in the background around the sprite and no one would be the wiser, but what if you have a really complicated background? Notice that there are two boxes under the tool box when you have the selector tool out. Normally, the top one is highlighted, but what happens if the bottom one is highlighted? Click the bottom box to highlight it, then drag your sprite onto the background.
Better, huh? Now you'll need to come up with what your characters are going to do and say. We'll just have Megaman and Proto Man standing and talking. Megaman will talk in the first and third panels, and Proto Man will talk in the second and last panels. Pick your sprites and place them. Remember to give a character an open moth if he/she is talking.
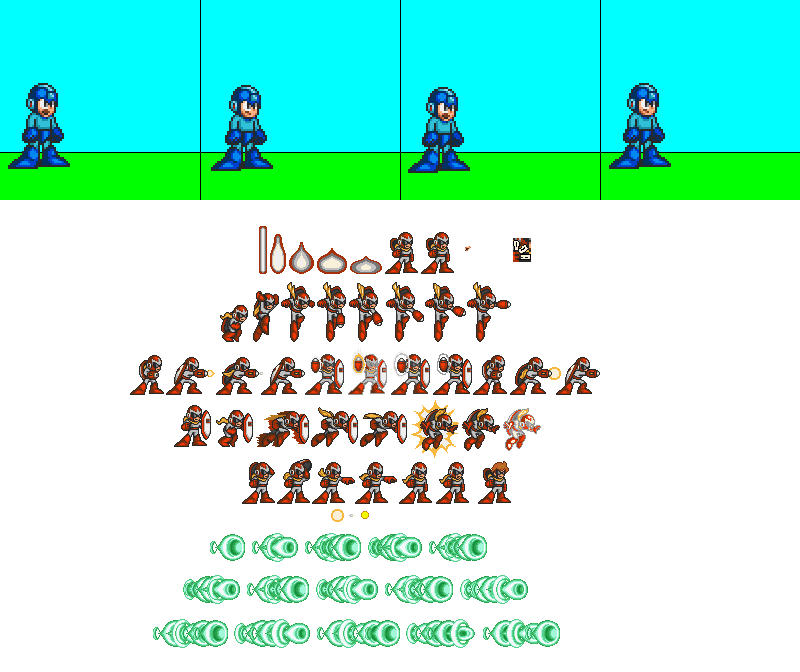
Now we run into a problem. We want Proto Man to be facing left, toward Megaman, but all of the Proto Man sprites are facing right. This problem is easily fixed. Select the sprite you want to use, back click, and hit copy, then paste it onto the picture. Now hit "Image" and then "Flip/rotate". Select "flip horizontal" then click "okay". The sprite will flip around. Now place in the Proto Man sprites.
Now you'll want to add in text. There are many ways of adding text. You can just write out the text on the comic and draw a line from the text to the character. I did that on a lot of my comics. Another more professional way is to write out the text underneath the panels. Now get out the box tool and make a box around the text. Make sure you leave room between the text and the box. Your comic should look like this:
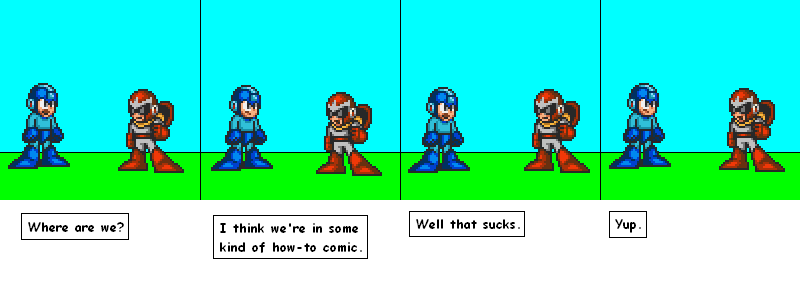
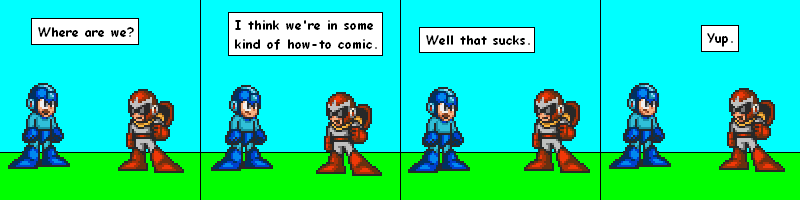
Now, remember that bottom box you highlighted to get rid of the white outline around your sprites? Well, you're going to need the top box highlighted now, so get out the selector tool and highlight the top box. Now use the selector tool to select the first text box. Make sure you don't select any of the area surrounding the box. Drag the box up into the comic above the characters heads. Do this with all of the text boxes. Now your comic should look like this:
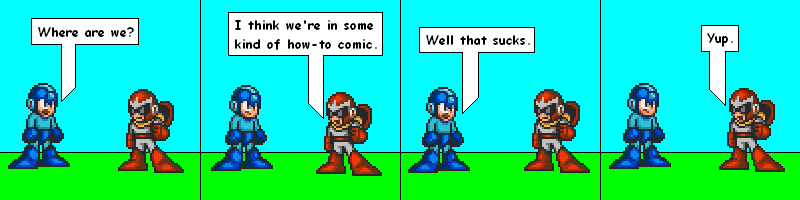
Now draw a straight line from the bottom of the box to near the character's head. draw a short diagonal line from the bottom of this line going up and away from the character. Now draw another straight line from the end of the diagonal line to the bottom of the text box. Fill the area within the lines with white, then erase the pixels separating the tag with the box. Do this with all of the text boxes. Now your comic should look like this:
Now go back to "Image" "Attributes" and set the width to 800 and the height to 200. Congratulations! You've made your first sprite comic! If you're new at comics and don't have any sprites, don't just search for them on Google. There are sprite websites that you can go to for sprites. If you're doing a Megaman comic, you can go to www.sprites-inc.co.uk where they have almost every sprite from every Megaman game ever. If you want Pokemon sprites, go to www.spriters-resource.com. They have a pretty good selection of sprites for Pokemon and a lot of other games, too.
Copyright 2006 Matt Mercier